This vegan chocolate mousse recipe is silky, rich, and unbelievably easy to make. No tofu, no avocado, just simple ingredients.
It’s one of those desserts that looks fancy but comes together faster than you’d expect. You can serve it in little jars for a dinner party or eat it straight from the bowl (no judgment). Plus, it’s naturally gluten-free, dairy-free, and completely crowd-pleasing.
I mean who doesn’t love a chocolate mousse? This is one of the quick vegan desserts you are going to love.
Many dairy-free vegan mousses use avocado which I have made before and it is quite an interesting flavor and texture. This vegan chocolate mousse recipe utilizes aquafaba which allows this recipe to more accurately imitate the eggs normally used.
It is easy and affordable and requires almost no preparation. I also use aquafaba in many other recipes such as Vegan Biscotti and my Whipped Matcha Latte. It is practically a vegan staple!
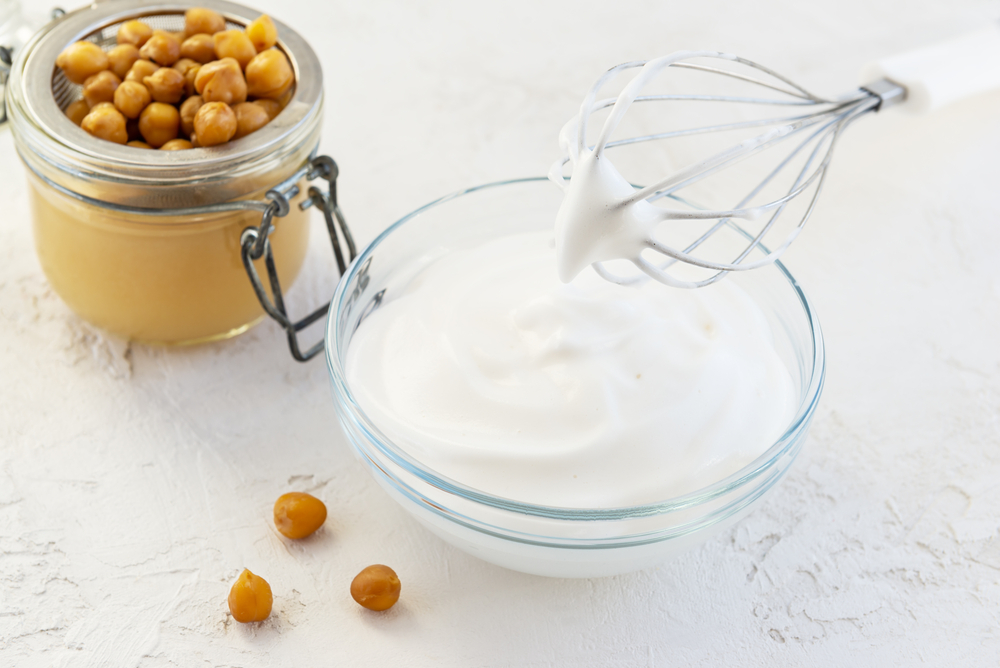
If you aren’t familiar with aquafaba, it is simply a fancy term for the liquid inside the chickpea/garbanzo bean can. The aquafaba helps the mousse form “peaks” in the same way that eggs do. It also quite easy to work with.
Scroll down for the full recipe card, or read on for my tips and variations first!

I feel the most importnat thing when considering this recipe is using only top quality ingredients. This means that instead of using cheap store brand maple syrup, you splurge on an all-natural brand. Use good qaulity chocolate and make sure every ingredient is the best you can afford. It really does make a difference.
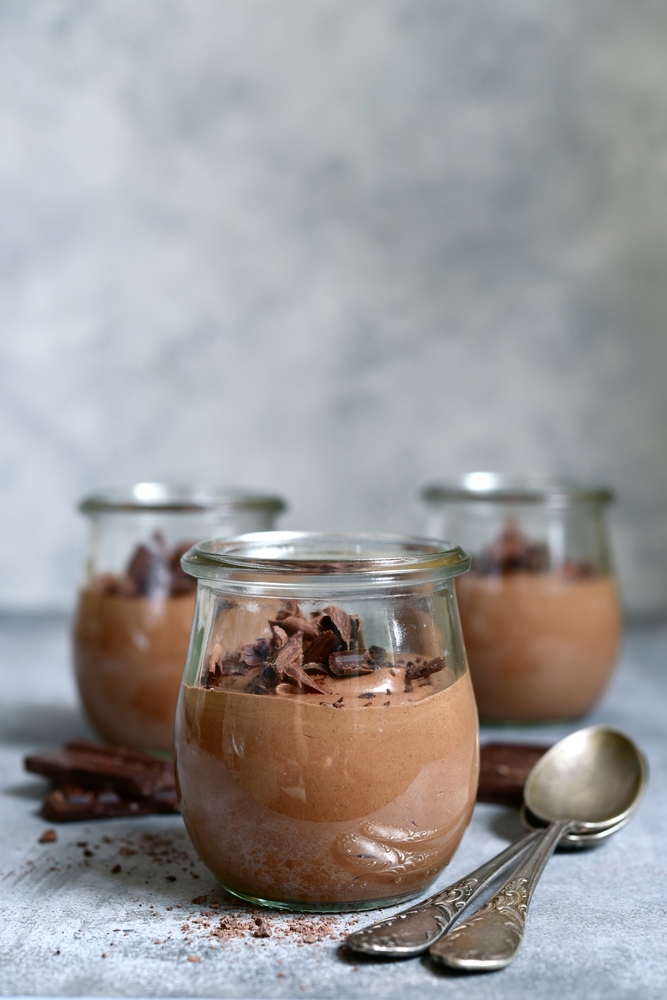
This mousse is comprised of only 4 ingredients, some of which you may already have on hand. It is completely vegan and you can utilize the sugar of your choice, depending on your interests and diet.
Ingredients and How to Make It
The magic of this mousse is in how quick it is. All you do is melt the chocolate, blend everything until smooth, and chill.
The base usually includes:
- Vegan chocolate (dark or semi-sweet)
- Plant-based milk (almond, soy, or oat)
- A little maple syrup or sugar for sweetness
- Aquafaba (liquid from canned unsalted chickpeas), chilled
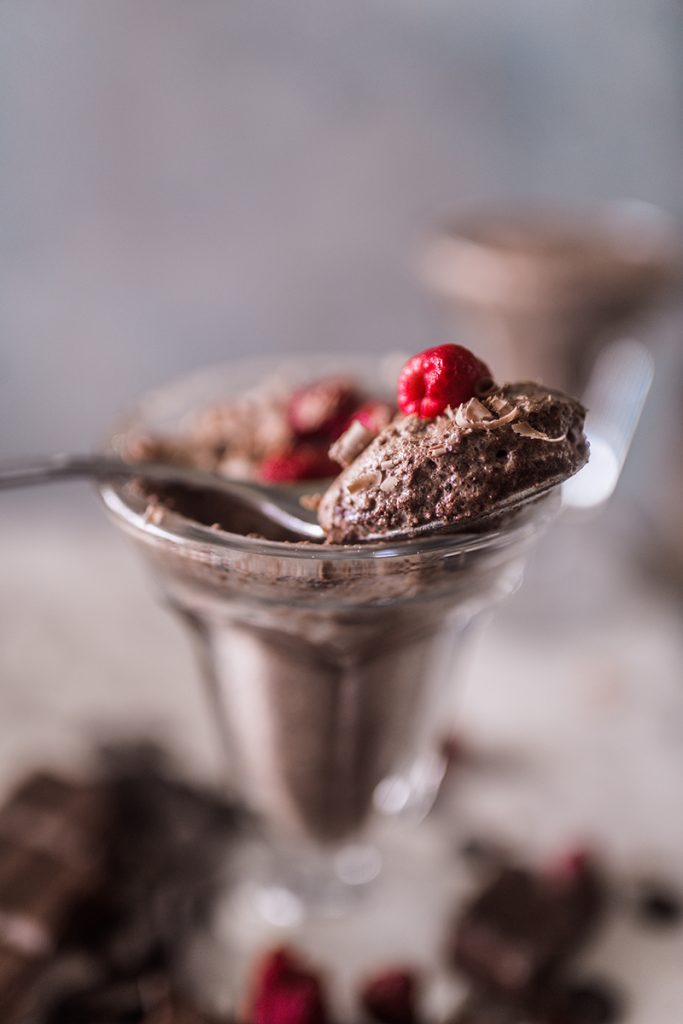
Once it’s chilled, it sets into a fluffy, spoonable texture that’s rich but light.
Serve this at the end of a cozy dinner or as a quick make-ahead treat when you want something rich but simple. It’s the perfect quick vegan dessert.
Using Aquafaba in Vegan Chocolate Mousse
Aquafaba is the liquid from a can of chickpeas and is what’s used to make this mousse light and airy.
To use it, drain a can of chickpeas and pour the liquid into a clean mixing bowl. Whip it with an electric whisk until soft peaks form, just like egg whites. Gently fold this fluffy aquafaba into your melted chocolate base right before chilling. It makes the mousse beautifully light and mousse-like without adding any flavour (don’t worry, it won’t taste like chickpeas).
If you prefer a creamier mousse, stick with the coconut cream version, both are delicious, just slightly different textures.
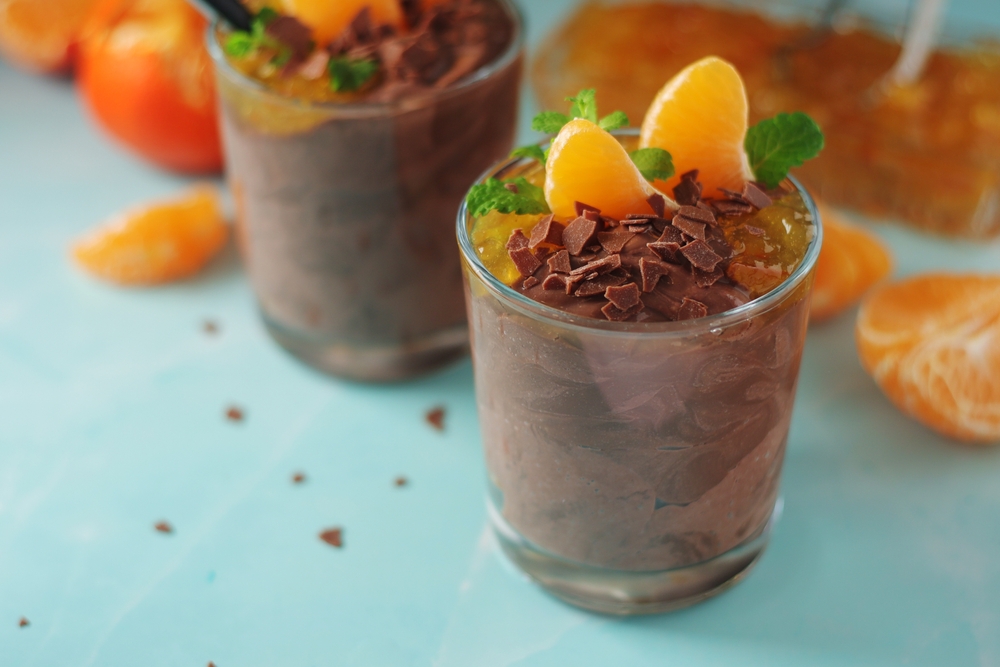
Toppings and Serving Ideas
This mousse is beautiful on its own but even better dressed up. Here are some of my favourites.
- A dollop of vegan whipped cream
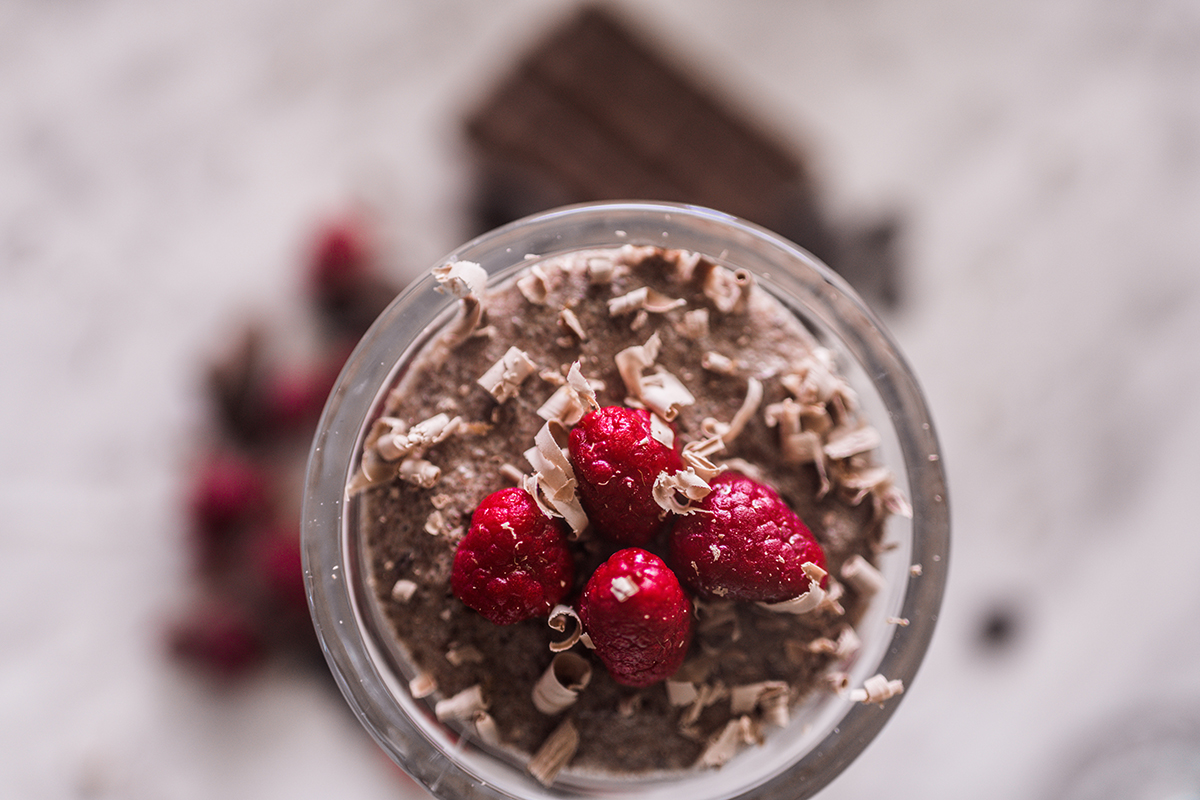
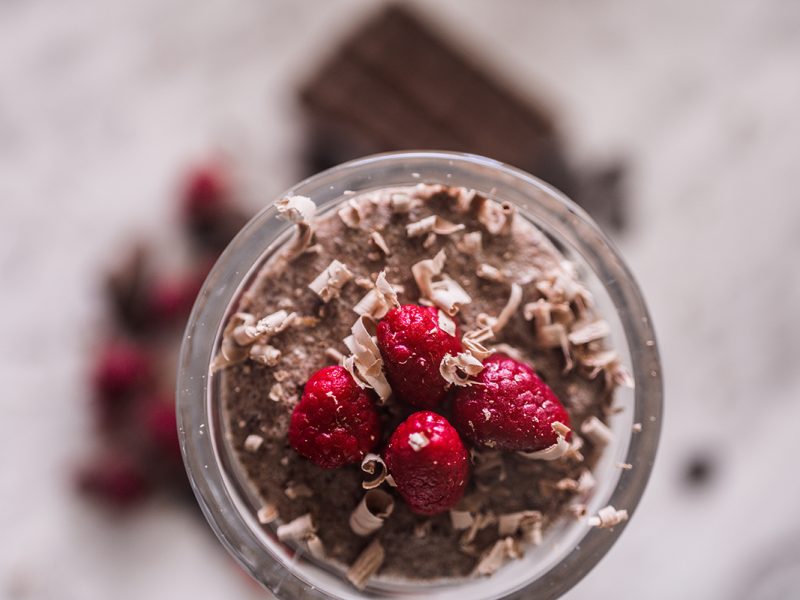
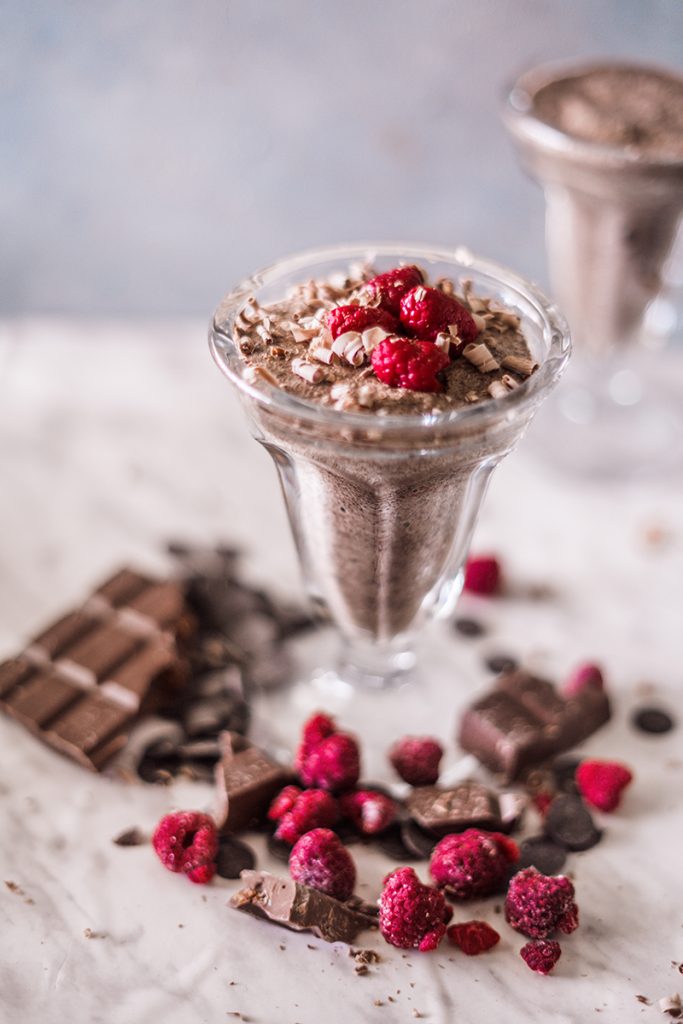
- Chocolate shavings or curls
- Fresh raspberries or strawberries
- A drizzle of vegan caramel sauce
- Crushed biscuits or nuts for crunch
- Oranges and orange jelly or jello
For an elegant dessert, layer it in small glasses with fruit or cookie crumbs. It ends up looking like something from a restaurant but takes ten minutes.
Storage Tips
Store your dairy-free vegan chocolate mousse covered in the fridge for up to three days. It firms up a little as it chills, so let it sit at room temperature for five minutes before serving if you like it softer.
Because it’s dairy-free and egg-free, it keeps beautifully without separating.
Vegan Chocolate Mousse FAQ
Can I make this ahead of time?
Yes! This vegan chocolate mousse recipe is perfect for making in advance. Store it covered in the fridge for up to three days. In fact, the flavour deepens and the texture improves after a few hours of chilling.
What’s the best chocolate to use?
Choose a good-quality dark or semi-sweet vegan chocolate that melts smoothly. Look for one around 60–70% cocoa for a balanced sweetness.
How can I make it extra fluffy?
If you like a lighter, airy texture, fold in aquafaba as described above. It makes the mousse cloud-like and adds volume without extra fat.
Can I use coconut milk or coconut cream instead?
Yes you can but I would advise coconut cream or full fat coconut milk. Coconut cream tends to get better results.
Can I freeze vegan chocolate mousse?
Yes, you can freeze it for up to a month. Thaw in the fridge overnight before serving. The texture will be slightly firmer, but still delicious.
4-Ingredient Vegan Chocolate Mousse (Gluten-Free)

This easy 4-ingredient vegan chocolate mousse is gluten-free too! Utilizing aquafaba [liquid from the chickpea can] you can create texture very similar to that using eggs. Make sure to use high quality ingredients to ensure the taste is unforgettable!
Don't let the "time" estimate fool you, the majority of the time is "chilling" your ingredients in the fridge. The active part of this vegan chocolate mousse recipe is really less than 20 minutes!
Ingredients
- ½ cup aquafaba (liquid from canned unsalted chickpeas), chilled
- 2 Tbsp maple syrup [can sub with sweetener of your choice]
- 1 Tbsp Vanilla extract
- 2/3 cup dark chocolate
- Raspberries for garnish (optional)
Instructions
- Strain a tin of chickpeas and save the aquafaba (liquid). Reserve 1/2 cup of the liquid and chill in a large glass bowl in the fridge for 15 minutes.
- Melt the chocolate in a saucepan or double-boiler over low heat until melted. Remove from heat and allow to cool to room temperature.
- Using a mixer on high speed, whip the aquafaba for 5-10 minutes until stiff peaks form. Add in the sweetener and the extract and then whip for another few minutes.
- Pour your cooled chocolate into the mixture and using a spatula, gently mix the
chocolate into the aquafaba until thoroughly mixed. - Spoon into cups or small dishes and place in the fridge for at least an hour to thicken.
- Top with fresh raspberries (or the fruit of your choice) and enjoy!
Notes
Make sure to use high-quality ingredients for best results! Please note: the serving size depends on the size cups used. Portions are enough for 4 people if you are using smaller cups and 2 people if you are plating in larger bowls.
 Easy Vegan Matcha Cake